Weaving Cast-on for Studio/Silver Reed Steel Bed Punch card Machines
by Roni Knutson
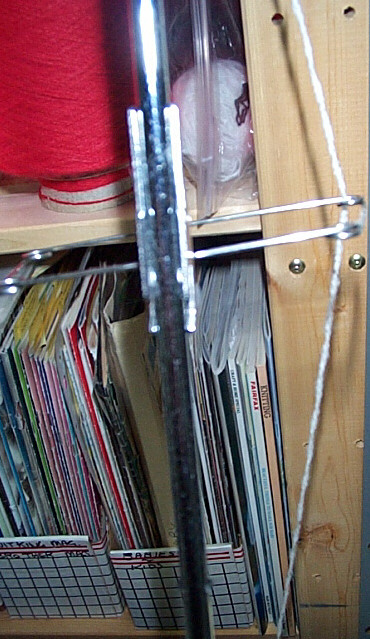
1. Feed yarn through the yarn guide (I've got my yarn changer guide on so it will look a bit different from the usual yarn guide) and up to the tension dial (auto tension).
Click the yarn into the tension dial (if you take a close look at it you will see there is a little piece of metal there that you must snap the yarn underneath).
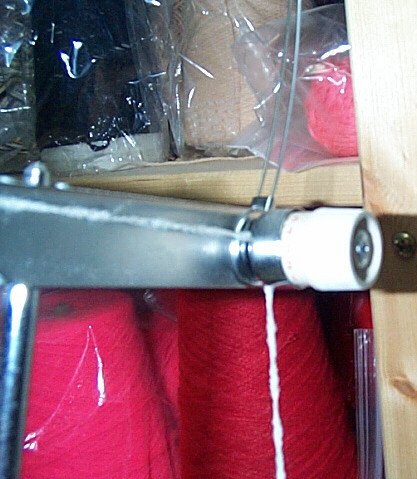
2. The yarn then comes forward horizontally, under the next guide, up to the tension springs and back down again to the next guide. Then insert the yarn into the mast clip. For 4 ply the tension should be set around 3. If you are not using 4 ply on cone adjust the dial until the yarn rises slowly. If it's too tight it won't rise at all and if it's too loose the tension spring will go to it's full height (and when you knit you will get loops at the beginning of your row).
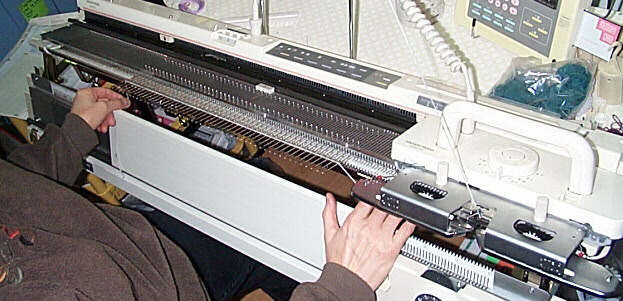
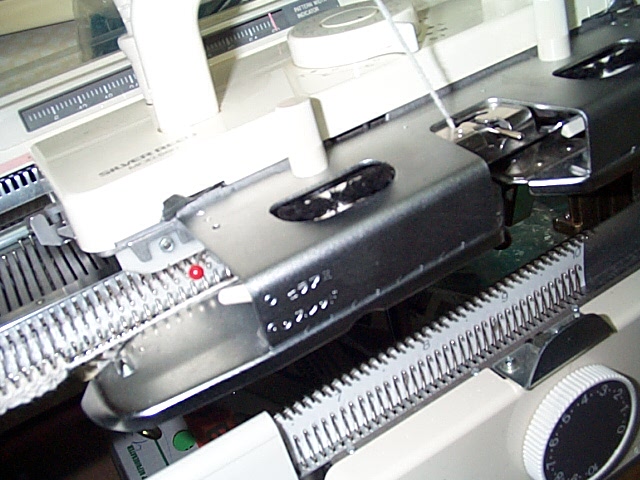
Carriage should be on the machine and the arm should be attached. Two things to watch out for. First, make sure the carriage is on properly. It should slide easily and the front shouldn't lift up. If it does, you have missed the little "lip" it must hook under. Second, when attaching the arm onto the carriage make sure you jiggle it a bit (the arm) as you screw the two nuts down, to make sure that it is seated properly.
Set the tension on the carriage. If you haven't any cone yarn use fine baby yarn for your first efforts at casting on). To be at T7 the number 7 should be at the 6 o'clock position on your dial. T1 makes smaller, tighter sts (more sts per 10 cm), T9 makes larger, looser sts (less sts per 10 cm.).
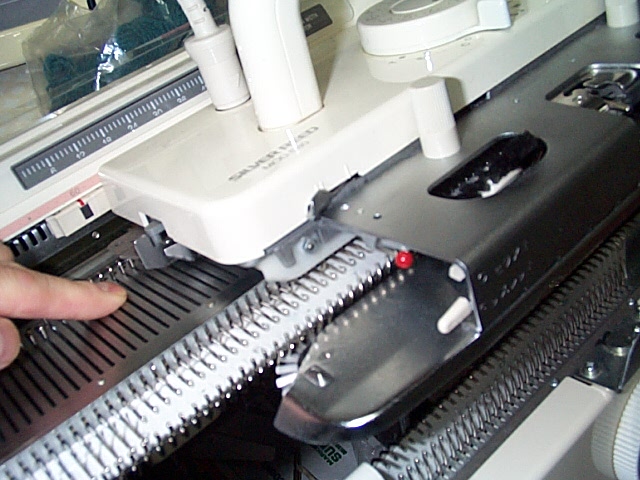
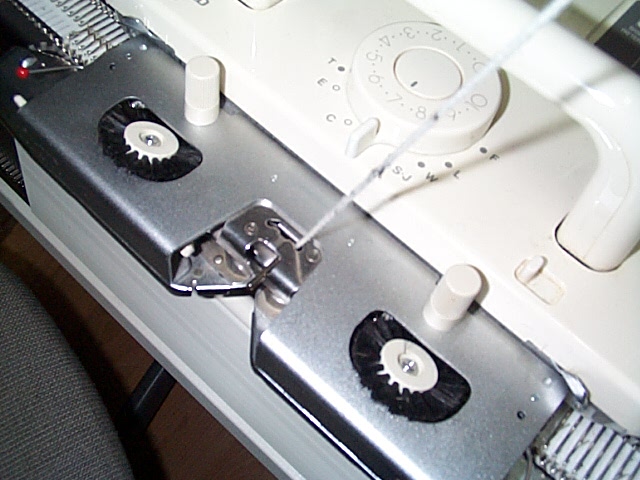
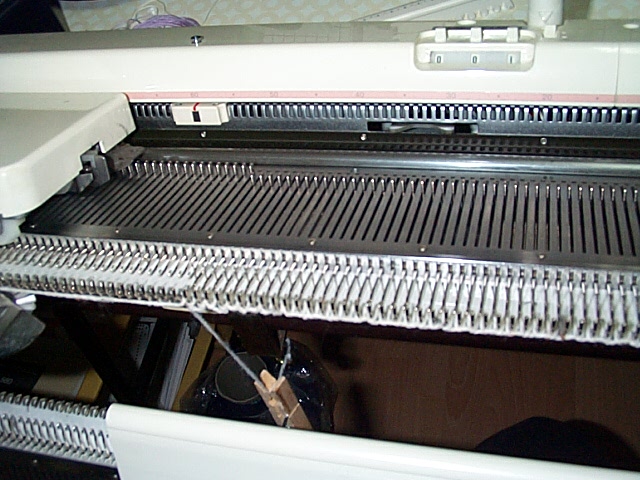
Carriage at right of bed. Side levers forward (to 'o'). On my SK580, shown in the photo, the side levers work automatically.
Weaving brushes down (if you have an old model you will have to insert the weaving brushes). No weaving brushes, no casting on. Russell Levers in. (The Russell lever is on the front of the carriage in the photo above, pretty well in the centre of the photo. You'll have one on the right too).
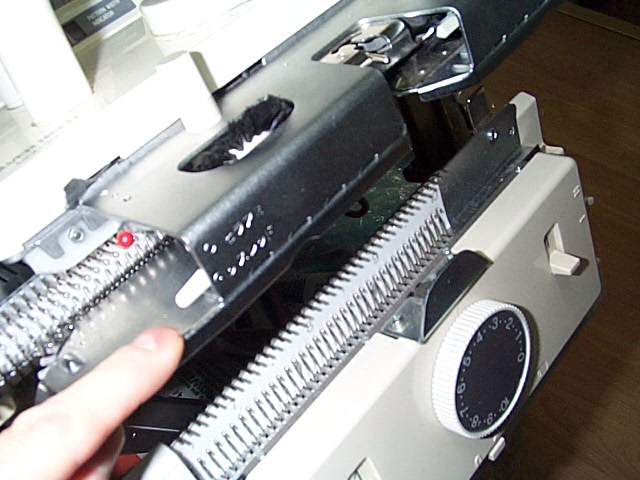
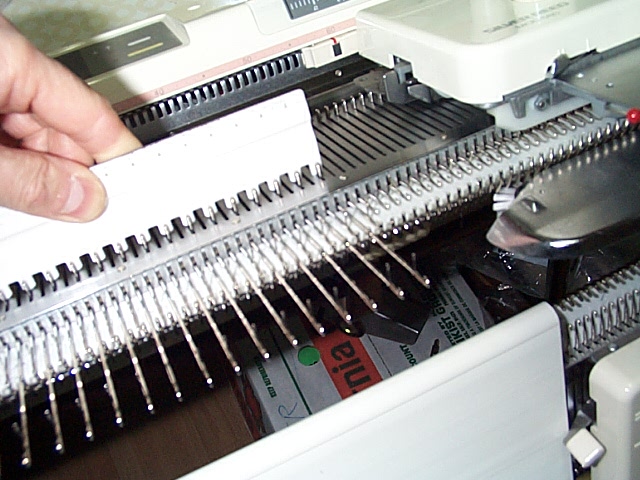
Using the flat edge of the small white ruler that comes with your machine bring all the way forward the amount of needles you would like to knit with (this is D position or Hold position). If you are just practicing, bring forward at least 40-0-40 (80 needles). (For those of you haven't noticed it yet the needle bed is marked with numbers starting in the centre with 0 and going out to the edges, so 40-0-40 means bring forward 40 needles on the left of '0' and 40 needles on the right.)
Now move the carriage to the left and back to the right. This will put all the needles in B position
(provided you don't have your Russell levers out - they should be in) and beats fiddling around with the ruler
trying to get all the needles to B position. You just let the carriage do the work for you. ;))
RC000.
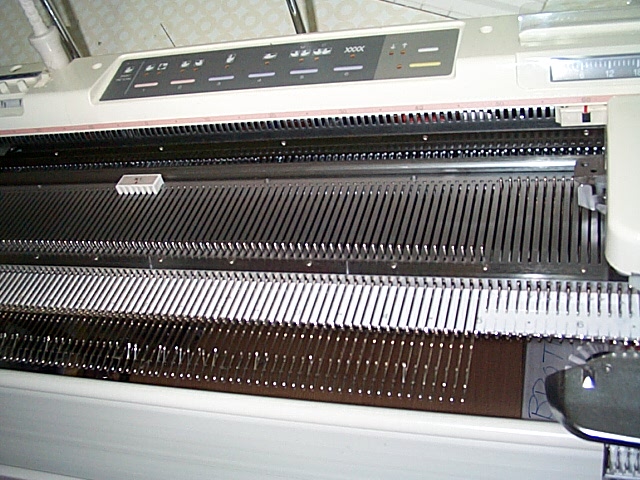
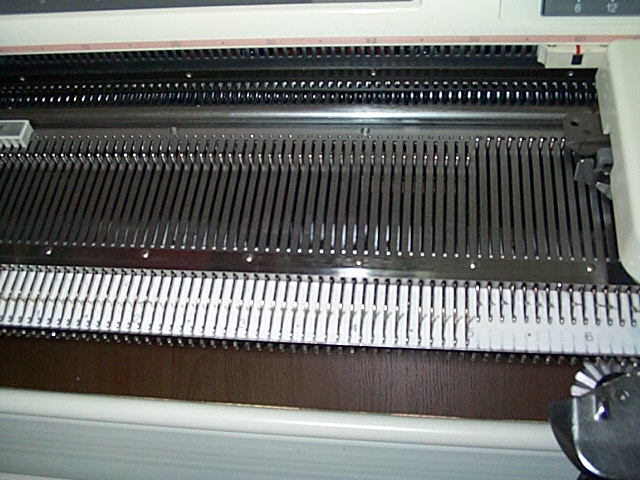
Using the serrated edge of the small white ruler, bring forward every other needle to D (hold position - in other words, all the way forward). Needles should now be in a 1 up, 1 down, position all across the bed.
Unclip yarn. Bring end of yarn down and insert in feeder 1 on the carriage. Feeder 1 has a little 'gate', so be sure to lock the gate after you have inserted the yarn.

Holding the end of the yarn with your left hand, insert your right hand between the yarn and the brushes under the carriage arm (this avoids getting the yarn caught in the brushes).
Draw the yarn up and over all the needles to the left side and pull down about 6 inches - don't let go of it.
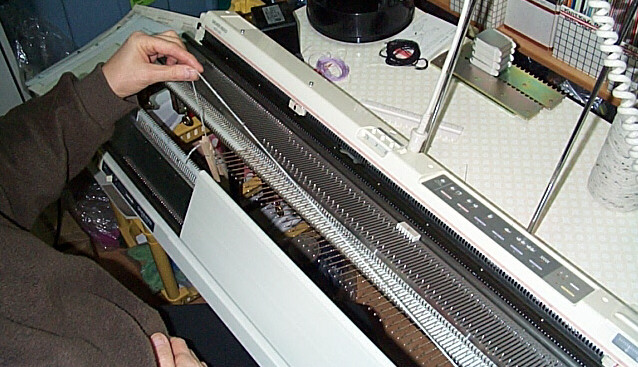
You should hold it there with your left hand or if you find this a bit fiddly you can use a peg (just a regular ordinary laundry peg) to weight the yarn down at the left hand side. Make sure it's down about 6 inches.
Move right hand out from between the yarn and the carriage and use it to push the carriage to the left and back to the right. Don't let go of the tail end of the yarn on the left just yet. Do a couple of more rows before you let go, or hang a clothes peg on it after the first two cast-on rows. (Be sure to completely pass all needles with the carriage, but be sure not to go too far past or you will get loops at the beginning of your row, or worse yet, a "jam").
Now that you have cast on you can take the weaving brushes off (after 6 rows), unless you plan to knit tuck.
If you plan to do two colour work you will need to put the side levers back when you start, otherwise
you can leave them forward and just knit away in stocking stitch.
In case you're wondering you're seeing photos of the Studio SK580 electronic.
| Copyright©rvk Nov 2005 |