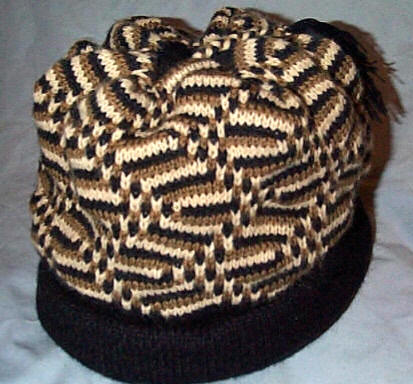
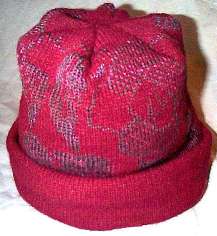
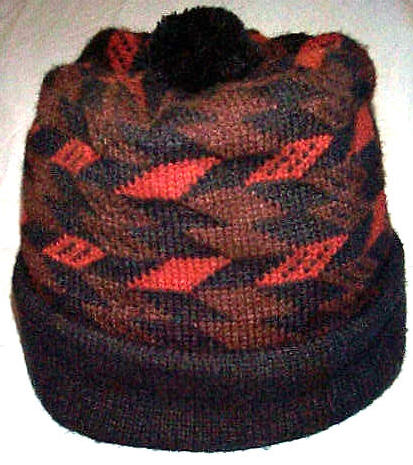
|
| Machine |
Any standard machine - no ribber needed |
| Size |
Ex-small, Small, Regular and Large |
| Materials |
4 ozs of Newry by Spinrite - two strands used throughout or any 4 ply |
| Gauge |
Not too important - adjust as necessary |
| |
First hat shown above was done on a Brother 930 and is pattern #307 from the Stitch World Book. It is 3 colour
tuck (2 rows of each colour). |
Regular Size
Cast on 61-0-86 (73-0-73 on electronics) in stocking stitch. 146 sts [6 repeats of 24 sts plus 1 stitch at each
edge for sewing up]. Tension 6. Knit 6 rows. RC000. Tension 7, knit 15 rows. Tension 8, knit to RC80, carriage
at right.
Brim - You have approximately 20 rows in which to put a design on the brim, see diagram below. If your
design takes up 20 rows then you must start the design on row 80. If you design is only 10 rows high then you will
need to start the design higher - approximately row 86. You will have to experiment with your design to see which
row you must start on. Continue on in stocking stitch - if you wish to change colour behind the brim this can be
done at row 140. At Row 144 you can start your second motif. You have approximately 30 rows in which to do your
motif - which will take you up to Row 174. If your design is larger, you can go as far as Row 185 but after that
you will have too much bulk when you go to sew up the toque. Skier and trees punchcard is
especially designed for this toque, although I would like to warn beginners that during the last few rows of the
trees the main colour tends to be drawn into the contrast. If you have an electronic, reverse yarns and image when
there is more contrast yarn showing in a row than main yarn and you'll avoid all the tangles.
At Row 184 change to Tension 7
At Row 200 change to Tension 6
At Row 206 cut yarn (close to the knitting) and do one pass with the carriage to take the knitting off the machine
- Do not Cast off
MAKING UP
Do not press. Pin side seams together taking care to make sure that the motif and name match at the side seams.
Sew side seams on your sewing machine. Fold hat wrong sides together and pin the two raw edges at the top, together.
Sew these edges together, which will take care of any unravelling and make it a lot easier to handle. Make sure
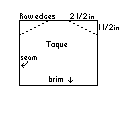
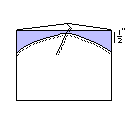
the brim motif is on the outside and the large motif on the inside. Sew top together by folding the hat flat (seam
to one side) and sew an angled line of stitching 1 1/2 inches deep by 2 1/2 inches wide off the top corner of each
side of the hat. Zig zag these (or serge) and cut off the excess.
|
|
|
You will now have an open spot at the top. Refold the hat so that it forms a cross and sew the final seam, starting
1 1/2 inches down from the top side, sew up towards the other two seams and down to the other side. Cut off excess.
A cross should be formed on the top. If you have a serger you can make a star * shaped top by serging off four
"triangles" and then serging one final seam.(see photos of above hats).
OTHER SIZES - see diagram below - read up
Ex-small 61-0-61 122 sts (5 x 24 plus 1 st for each edge)
Small 67-0-67 134 sts (5 x 24 plus 12 left over)
Large 80-0-80 160 sts (6 x 24 plus 16 left over or 13 x 12 plus 4 left over)
|
Final row 216
RC210 T6
RC 200 T7
|
Final row 206
RC 200 T6
|
|
|
| |
RC 184 T7
|
Final row 200
RC194 T6
RC 184 T7
|
Final row 200
RC194 T6
RC 184 T7
|
|
Large motif
RC144
|
Large motif
RC144
|
Large motif
RC144
|
Large motif
RC144
|
| |
|
|
|
|
Brim motif
RC80
|
Brim motif
RC80
|
Brim motif
RC80
|
Brim motif
RC80
|
|
LARGE
RC000 T8
|
REGULAR
RC000 15 rows T7
|
SMALL
then T8
10 rows T7
Knit 6 rows T6
Cast on 134 sts T6
|
EX-SMALL
then T8
10 rows T7
Knit 6 rows T6
Cast on 122 sts T6
|
|
10 rows T7
Knit 6 rows T6
Cast on 160sts T6
|
Knit 6 rows T6
Cast on146 sts T6
|
|
|
This pattern was first published in The Carriage Trade, Issue #31, June 1989 and has been
updated to include more sizes.
| Copyright©rvk Feb 1999 |
Home
|
|
